
Pearl Art
Diamond art's quieter cousin, for people who think glitter is a little much.
- Cost to start
- ~$30 to start
- Learning curve
- 2 / 5
- Typical session
- 30-60 min
- Physical demand
- 1 / 10
- Social level
- 1 / 10
- Setting
- At home
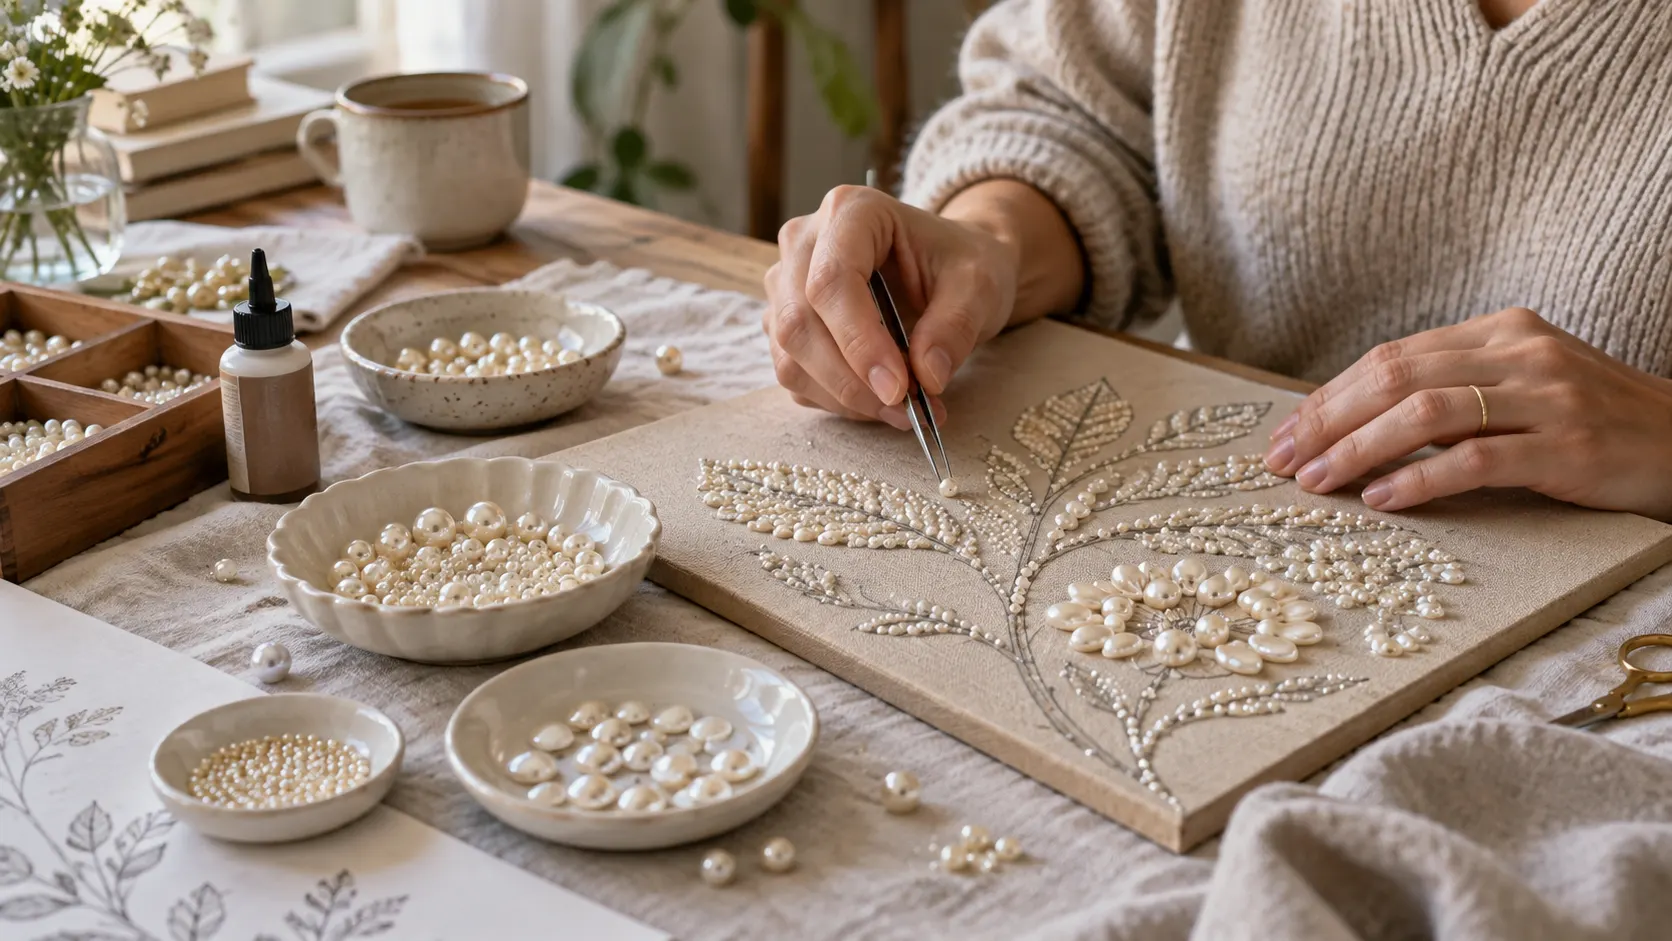
Pearl art is exactly what it sounds like: gluing small faux-pearl beads onto a surface until it looks expensive, using roughly the same logic as diamond painting but with a matte, glossy-bead finish instead of sparkle. It's a smaller, less mainstream craft than diamond art — fewer big pre-printed kits exist — which mostly just means you're building something with your own materials instead of following a canvas someone else designed.
What it costs
Bare-minimum start: about $10 — a small bag of mixed faux pearl beads and a bottle of household craft glue, applied to something you already own: a photo frame, a small box, or a plain ornament. This is genuinely enough to learn whether you like the process before buying anything specific to it.
Practical setup: about $30. That's a larger assorted pearl bead pack in a few sizes, a proper adhesive built for beads and hard surfaces rather than all-purpose glue, and a plain wooden or foam surface to decorate — a small box, a picture frame, or a styrofoam ball. Tweezers for placement are usually the one tool worth having, and a basic pair is cheap enough to barely count.
Optional later: a clear resin topcoat to seal and protect a finished piece so beads don't pop off with handling, mixed rhinestone-and-pearl packs for more visual texture, and pre-cut wood shapes (boxes, letters, ornaments) made specifically for embellishing.
The one thing worth spending on is a real adhesive rather than school glue — pearls are heavier than rhinestones and slide off weak glue before it fully cures. There's no meaningful ongoing cost; a bead pack lasts through several small projects.
What to buy
An assorted pearl bead pack with a range of sizes — bigger beads cover ground fast, smaller ones handle detail and edges. A stronger adhesive (E6000 or a comparable craft glue) rather than glue-stick or school glue, which won't hold the bead's weight. A blank object to decorate — a small wood box, photo frame, or foam shape works well for a first project. Tweezers, for placing beads precisely without transferring finger oil onto the glue.
Skip buying a giant single-color bead bag before you know your color palette; a mixed pack teaches you what you actually reach for. Skip resin sealant on your first project — it's an extra step with its own learning curve, worth adding once you've finished a piece you actually want to protect.
How to start
Start with a small flat surface, like a picture frame, rather than a curved or 3D object. You don't need resin sealant or a huge bead collection yet.
Plan your layout by laying beads on the surface dry before any glue comes out — pearl art has no printed guide the way diamond art kits do, so this planning step matters more here. Apply glue to a small section, place beads with tweezers while it's still tacky, and press gently — pearls are heavier than rhinestones and need a firmer bond, so hold each one a beat longer than feels necessary. Work outward from a corner or edge rather than the middle, so you're not reaching across wet glue. Let a finished piece cure fully, at least 24 hours, before handling it. The most common beginner mistake is spacing beads too tightly, which leaves no room to fix a crooked one without disturbing its neighbors — leave a hair's breadth of gap as you go.
Is it for you?
Pearl art suits people who like diamond art's repetitive, hands-busy rhythm but want a quieter, more understated result — think jewelry box or keepsake rather than a wall canvas. It rewards a steady hand more than diamond art does, since there's no printed grid keeping you on track. If you want a finished piece to follow a picture step by step, diamond art will suit you better; if you'd rather freehand a design onto an object you already care about, pearl art gives you that freedom.
Starter gear
Soft suggestions to get going. These are affiliate links — buying through one may earn us a commission at no extra cost to you.
Tagged
More like this
Mixology
Measuring liquids precisely so that later you can drink them less precisely.
Diamond Art
Paint by numbers for people who found paint by numbers insufficiently sparkly.
Woodworking
Turning boards into furniture, or, on your first attempt, into a wobbly cautionary tale.
Rock Tumbling
Putting ugly rocks in a machine for a week so they come out looking expensive.
Coffee Brewing
Spending $80 on gear to make a coffee objectively worse than the $2 gas station one, at first.